The Best Answer to the Ruy Lopez: The Schliemann Defense
Have you ever heard of the Schliemann Defense? A lot of players haven’t - That is why learning it allows you to quickly draw White into unfamiliar territory where you’ll know the terrain better.
While the Ruy Lopez is infamous for leading to rather boring, predictable games, the Schliemann throws a spanner in the works. By playing 3...f5, Black refuses to play ball and launches its own counter-assault on the center.
White must be careful not to slip up. Any false moves may be punished severely - which is one of the reasons the Schliemann scores far more highly than any of Black’s other answers to the Ruy Lopez!

Defying the Ruy Lopez: Escaping the Spanish Torture
The Ruy Lopez or ‘Spanish Game’ opening starts with the moves: 1. e4 e5 2. Nf3 Nc6 3. Bb5. The opening’s nickname the ‘Spanish Torture’ is a nod to how difficult it is to play against. One of the most complex openings in chess, Black must know a world of theory to counter the endless ways that White can win the center.

The great thing about playing an offbeat response like the Schliemann Defense is that you immediately take White out of their common repertoire and out of their comfort zone. By studying this opening, you’ll almost certainly know the moves better than White and so have a fantastic chance of winning a quick advantage.
Schliemann Defense Statistics
To see how the Schliemann Defense compares to other responses to the Ruy Lopez, let’s take a look at the statistics side by side. These figures were taken from 33 million games across all levels on lichess.org. Blitz and bullet games were omitted to provide more reliable results:
| 3… | Percentage of Games Played | Points Won (%) |
| a6 | 25 | 46.5 |
| Nf6 | 20 | 45 |
| d6 | 20 | 45.5 |
| Bc5 | 10 | 47.5 |
| f5 | 1 | 51.5 |
From the table, we can see that despite only being played in 1% of games, the Schliemann Defense scores head and shoulders better than any of Black’s most common responses. Astonishingly, the opening even scores Black a distinct majority!
Schliemann Defense Main Variations
From move four, White has many ways to respond to Black’s surprising move. Let’s take a look at each of them, one by one.
If White Takes the Bait (4.exf5)
The fastest way that White can succumb to the Schliemann Defense is by capturing the ‘free pawn’ (4.exf5). Despite this being a losing move, it’s White's second-most commonly played response of all. As with the Schliemann Defense’s Italian Game counterpart, the Rousseau Gambit, simply pushing your king’s pawn (4...e4) causes all kinds of problems for White.
1. e4 e5 2. Nf3 Nc6 3. Bb5 f5 4. exf5 e4:

Look carefully: Where will White’s knight go? All squares are covered by Black’s pieces except g1 – where the knight came from! Because White is loath to undevelop the knight, they’ll usually search for other options.
5.Bxc6
By capturing your knight on c6, White hopes to free up d4 for its knight to move to. The trouble is, that once you retake with your queen’s pawn (5...dxc6), your queen now controls the d-file, so d4 is out of bounds again. Instead, White is now forced to play 6.Ne5, ouch!
1. e4 e5 2. Nf3 Nc6 3. Bb5 f5 4. exf5 e4 5. Bxc6 dxc6 6. Ne5 Bxf5

White’s position is now extremely clumsy. Notice how its central knight remains difficult to defend. From here, Black reclaims its pawn 6...Bxf5, develops fast, and piles pressure on White’s knight and kingside together.
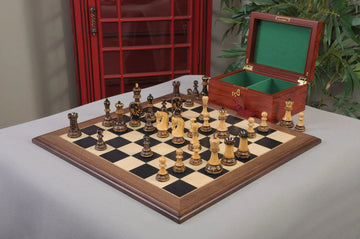
The Burnt Zagreb '59 Series Chess Set, Box, & Board Combination
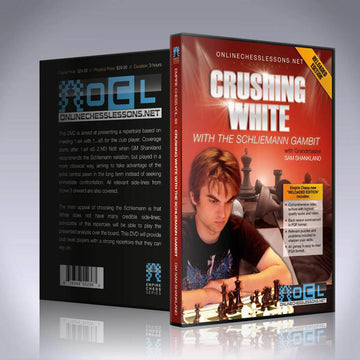
CLEARANCE - Crushing White With the Schliemann Gambit - EMPIRE CHESS

Tap N Set Pro Digital Chess Clock - with DOUBLE DISPLAYS
Qh5 Check!
After advancing the f-pawn, one should always be careful of White queen attacks on h5. These can often be used to trap the kingside rook:

Typically, a knight on f6 is your best defense against this tactic, but in the Schliemann, either your bishop on f5 or queen on the dark-squared central diagonal is enough to neutralize the threat.
Chess databases show that many players still play Qh5 not realizing its futility. At best, White wastes a move, giving Black an even greater lead in development. At worst, it could cost White a piece or more.
If White Captures on c6 (4.Bxc6)
In the Ruy Lopez, White has the option to swap its bishop for the knight on c6. The Schliemann Defense is no exception. But this doesn’t mean that the pawn on e5 is now easy pickings! What happens if White tries?:
1. e4 e5 2. Nf3 Nc6 3. Bb5 f5 4. Bxc6 dxc6 5. Nxe5 Qd4

Now, Black’s queen is hitting both White’s knight and e4 pawn simultaneously – White can’t save both. Whatever White tries now, Black ends up better off.
Incredibly, 69% of opponents now try the classic Qh5 check hoping to win a rook, but this is a blunder! Because your queen controls the dark-squared diagonal, your rook remains protected. White is now destined to lose its knight.
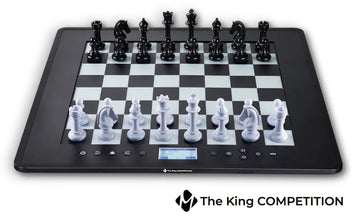
The Millennium King Competition Chess Computer
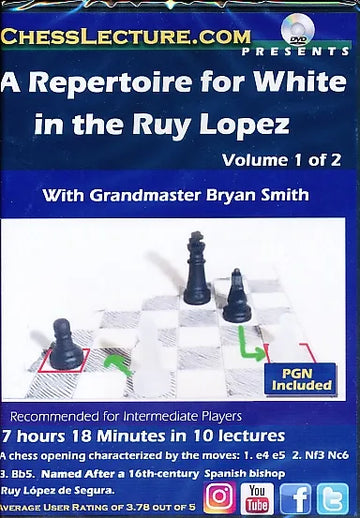
A Repertoire for White in the Ruy Lopez - Chess Lecture - Volume 183 - 2 DVDs
If White Plays 4.d3 – Think Kingside Attack!
According to chess engines, 4.d3 is White’s strongest response to the Schliemann Defense. Yet many players don’t know how to continue in the best way. As Black, you can often turn on a dangerous kingside attack following these simple plans:
Start by trading pawns on d4, playing Nf6, and mirroring White’s pin with Bb4. Trade your bishop for the knight and castle kingside. If White plays the common moves, the board will end up looking like this:
1. e4 e5 2. Nf3 Nc6 3. Bb5 f5 4. d3 fxe4 5. dxe4 Nf6 6. Nc3 Bb4 7. O-O Bxc3 8. bxc3 d6 9. Bg5 O-O 10. h3 Qe8 11. Re1 Qg6

With ...Qg6, White’s bishop is now effectively pinned: If it moves, then ...Bxh3 spells doom. Most opponents will trade the bishop with the knight, but here you simply capture with your rook to bring another piece in on the attack.
Soon, you may be able to add a second rook to create an overwhelming offensive that White will struggle to hold back. From the position above, Black wins nearly 70 points from every 100 games!
White’s Best Way to Counter the Schliemann Defense: 4.Nc3
Statistically, the strongest way for White to answer the Schliemann Defense is 4.Nc3. By doing so, White covers its threatened e4 pawn without opening itself up to any further dangers. From here, Black usually exchanges pawns on e4 (4...fxe4 5. Nxe4).
1. e4 e5 2. Nf3 Nc6 3. Bb5 f5 4. Nc3 fxe4 5. Nxe4:

Notice how e5 now remains precarious for Black. If Black plays 5...Nf6, responding with 6.Qe2 puts even more pressure on the fragile square.
If Black moves its queen's pawn (either 5...d5 or 5...d6), its knight is now pinned to its king, inviting White’s knight to join in the attack on e5. It’s a complex position for both sides, but White probably has a slight advantage from the outset.
Fortunately, 4.Nc3 is only played in 11% of games. Even if your opponent does play it, they're unlikely to find 6.Qe2. Play safe and you still have a good chance of winning an equal position.
The Gilded Zagreb '59 Series Chess Set, Box, & Board Combination
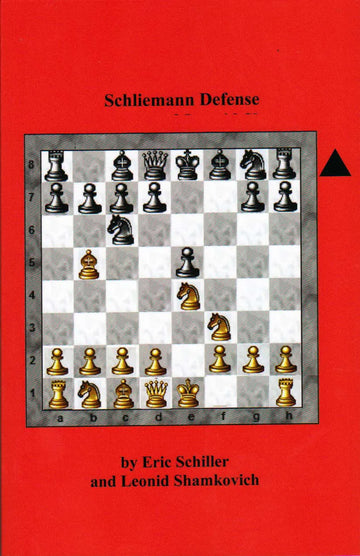
Schliemann's Defense
Conclusion
The Schliemann Defense is a surprising and dangerous way to counter the Ruy Lopez that often forces your opponent into uncharted waters. Indeed, playing 3...f5 is a great way to frustrate White’s usual plans and take the game into your own hands.
Surprise factor aside, the Schliemann Defense is a legitimate weapon in its own right. In the examples above, you can see how Black regularly comes out on top in many of the most common lines. The outstanding statistics only reaffirm what an underrated opening this is!
The Schliemann Defense FAQs
In the Schliemann Defense, Black offers White the chance to capture a free pawn – so why isn’t this considered a gambit? The reason is: White simply cannot afford to capture the pawn! In our guide above, you can quickly see why doing so can be so disastrous for White and should always be avoided.
Yes! In fact, the Schliemann Defense is seen more often at master level than at amateur level. Top players who’ve been seen utilizing the opening most frequently include Mark Lyell, Ventzislav Inkiov, and Mladen Zelic.
As you’ve seen from this guide, in the Schliemann Defense there are many lines to memorize, meaning this opening is better suited for intermediate or advanced players. On the other hand, other lines of the Ruy Lopez aren’t simple either! If you can remember some basic principles, then even beginner chess players could enjoy success with the Schliemann Defense!